Come check out my new blog at BeingGenevieve.com
So if you are anything like me you have several shirts in the closet, that were super cheap, that you thought weren't that bad when you bought them, but after one wearing you realized you were wrong. Now, they are just collecting dust.
 |
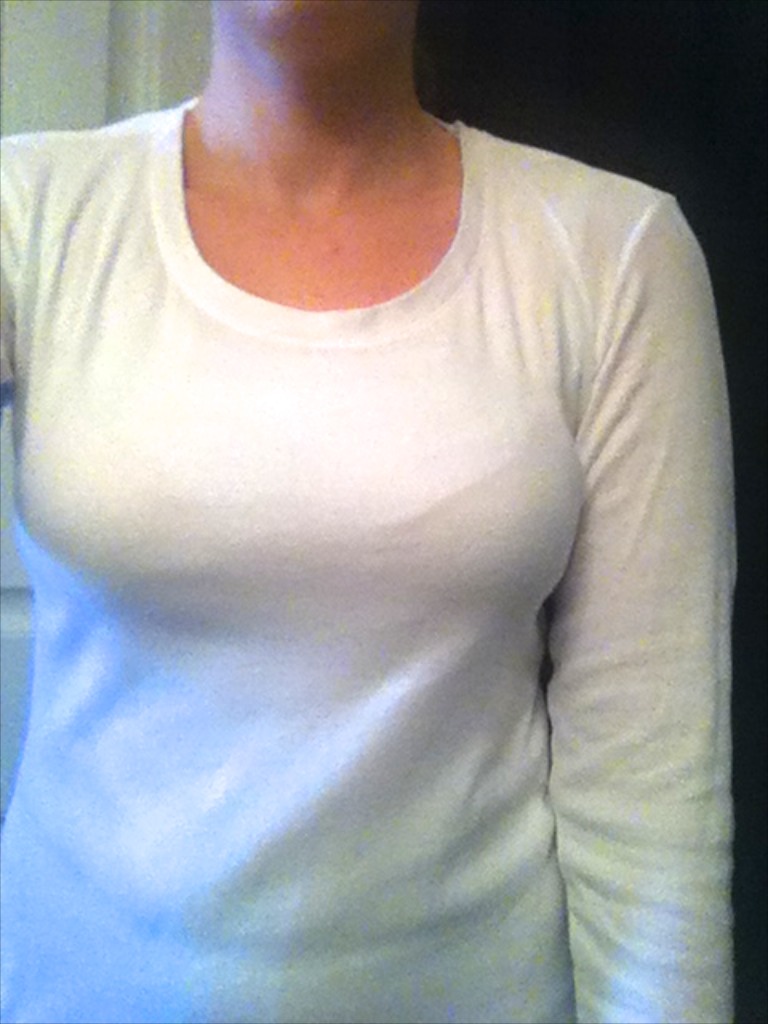
| Before |
 |
| After |
Here is a frumpy, low-cut shirt I bought
at Old Navy several years ago that was like $5, but I wore once and
realized it wasn't right for me.
Here's what to do . . .
(this is my first tutorial so I forgot to take pictures of all the steps, sorry)
I began by putting my shirt on inside out and pinning the shoulders up to where I wanted it; to get rid of the low-cut neckline. I also placed a pin on the arm where I wanted the sleeve length to end up.

Take off the shirt carefully and fix the pins so they are equal distances down from the original shoulder seam on both sides on the shoulders.
Take a mark-be-gone pen and draw a line tapering down to where your finished sleeve will be. Sew directly on that line.

Put your shirt back on and make sure the shoulders and neckline ended up where you wanted them.
Also, pull the sides and pin to how snugly you want the shirt to fit (forgot to take picture).
Pin the sides of your shirt (equally brought in on both sides), mark and sew just as you did for the shoulders.

 |
| Remember to try the shirt on again to make sure the shirt fits correctly. |
Now cut all your seams (shoulders/sleeves and sides) to 1/4'' and serger or zig-zag seams.

Take your shirt mark where you want your finished sleeve to fit and then mark 3'' below that. Now cut along both lines. Don't worry about leaving length for sleeve allowances because you will be adding a band.
 |
| Don't look at my lines, I kept changing where I wanted it and how much of a band I wanted. |
Now take the sleeve finished length divided by 2 and cut a piece of very skinny elastic. (My sleeve was 8'' so I cut a piece of elastic at 4'').
Now sew the elastic to the sleeve, starting at the top of the sleeve and ended at the very bottom of the sleeve. Stretch/pull the elastic as you sew; don't stretch the sleeve fabric at all.

Try the shirt on and draw a line so you know how much to bring the under part of the sleeve up. Take off and cut. Doesn't need to be perfect, you are adding a band to it.

Now for the sleeve band . . .
This is probably going to be a little confusing without pictures, but I will try my best.
Take that 3'' tube like piece you cut from the sleeve and fold it in half with wrong-sides together (or seams on the inside). Now you have a much thinner tube piece.
Pin and sew it to the sleeve with a 1/4'' seam. Serger or zig-zag seams to finish them so they won't fray.

Now top stitch on the sleeve just above the seam where the band and sleeve come together.


Now shake/wash off all the remaining closet dust and put on your fabulously new re-fashioned shirt.
whoa. You are too crafty-fancy!
ReplyDeleteWoah! I would love to see a close up picture of the finished sleeve from the side. Amazing. Would take me a week to do that and I would be so crabby.
ReplyDeleteUpon your request I have added a picture of the finished sleeve from the side.
Delete